Simple BlTouch V3.1 and CR10s install?
Finding a hardly used stock CR10S for $75 on Facebook Marketplace was
too tempting. My thought was to use it for prototype/functional/large parts and leave the heavily modded Ender 3 v2 for parts that needed to look good or where the tolerances where not very forgiving, since it has taken a while to calibrate and tweak it to get it to that point.
Once I brought it home and set it up, I immediately replaced the nozzle, since
the previous owner mentioned the nozzle was clogged and it had issues. Then I ran a test print with the SD card method. Printed great! 😄
Probing it out.
The CR10s was stock, no probe and even though it's going to be used for less detailed parts, it's just something that helps with layer adhesion and general print quality. So I had the bright idea that since I had an old BLTouch around laying around that I swapped out with a CRTouch on my Ender, why not use that? Simple right?
Challenge accepted...like it or not.
With my initial Googling of how to install the BLTouch, it didn't take me long to realize that:=
- The stock firmware needs to be updated with BLTouch support (I assumed...)
Good luck finding it though, since CR10s hasn't been supported for a bit. - All BLTouch's are not made equally. Wire colors not the same as the guides I found on the net
- You have to either buy a splitter type extender for the BLTouch or make/hack one up since the Creality 2.1 board I had does not have one dedicated BLTouch plug like the Creality 4.27 board that I have in the Ender.
Trial and error begins
First off, I am really surprised I haven't popped either the touch or the board while making this whole project work.
Searching Google for BLTouch, CR10s and Creality 2.1 board will result with a few solutions, from guides in forums and a few YouTube videos. All seemed to not work in my instance.
So here is my BLTouch...
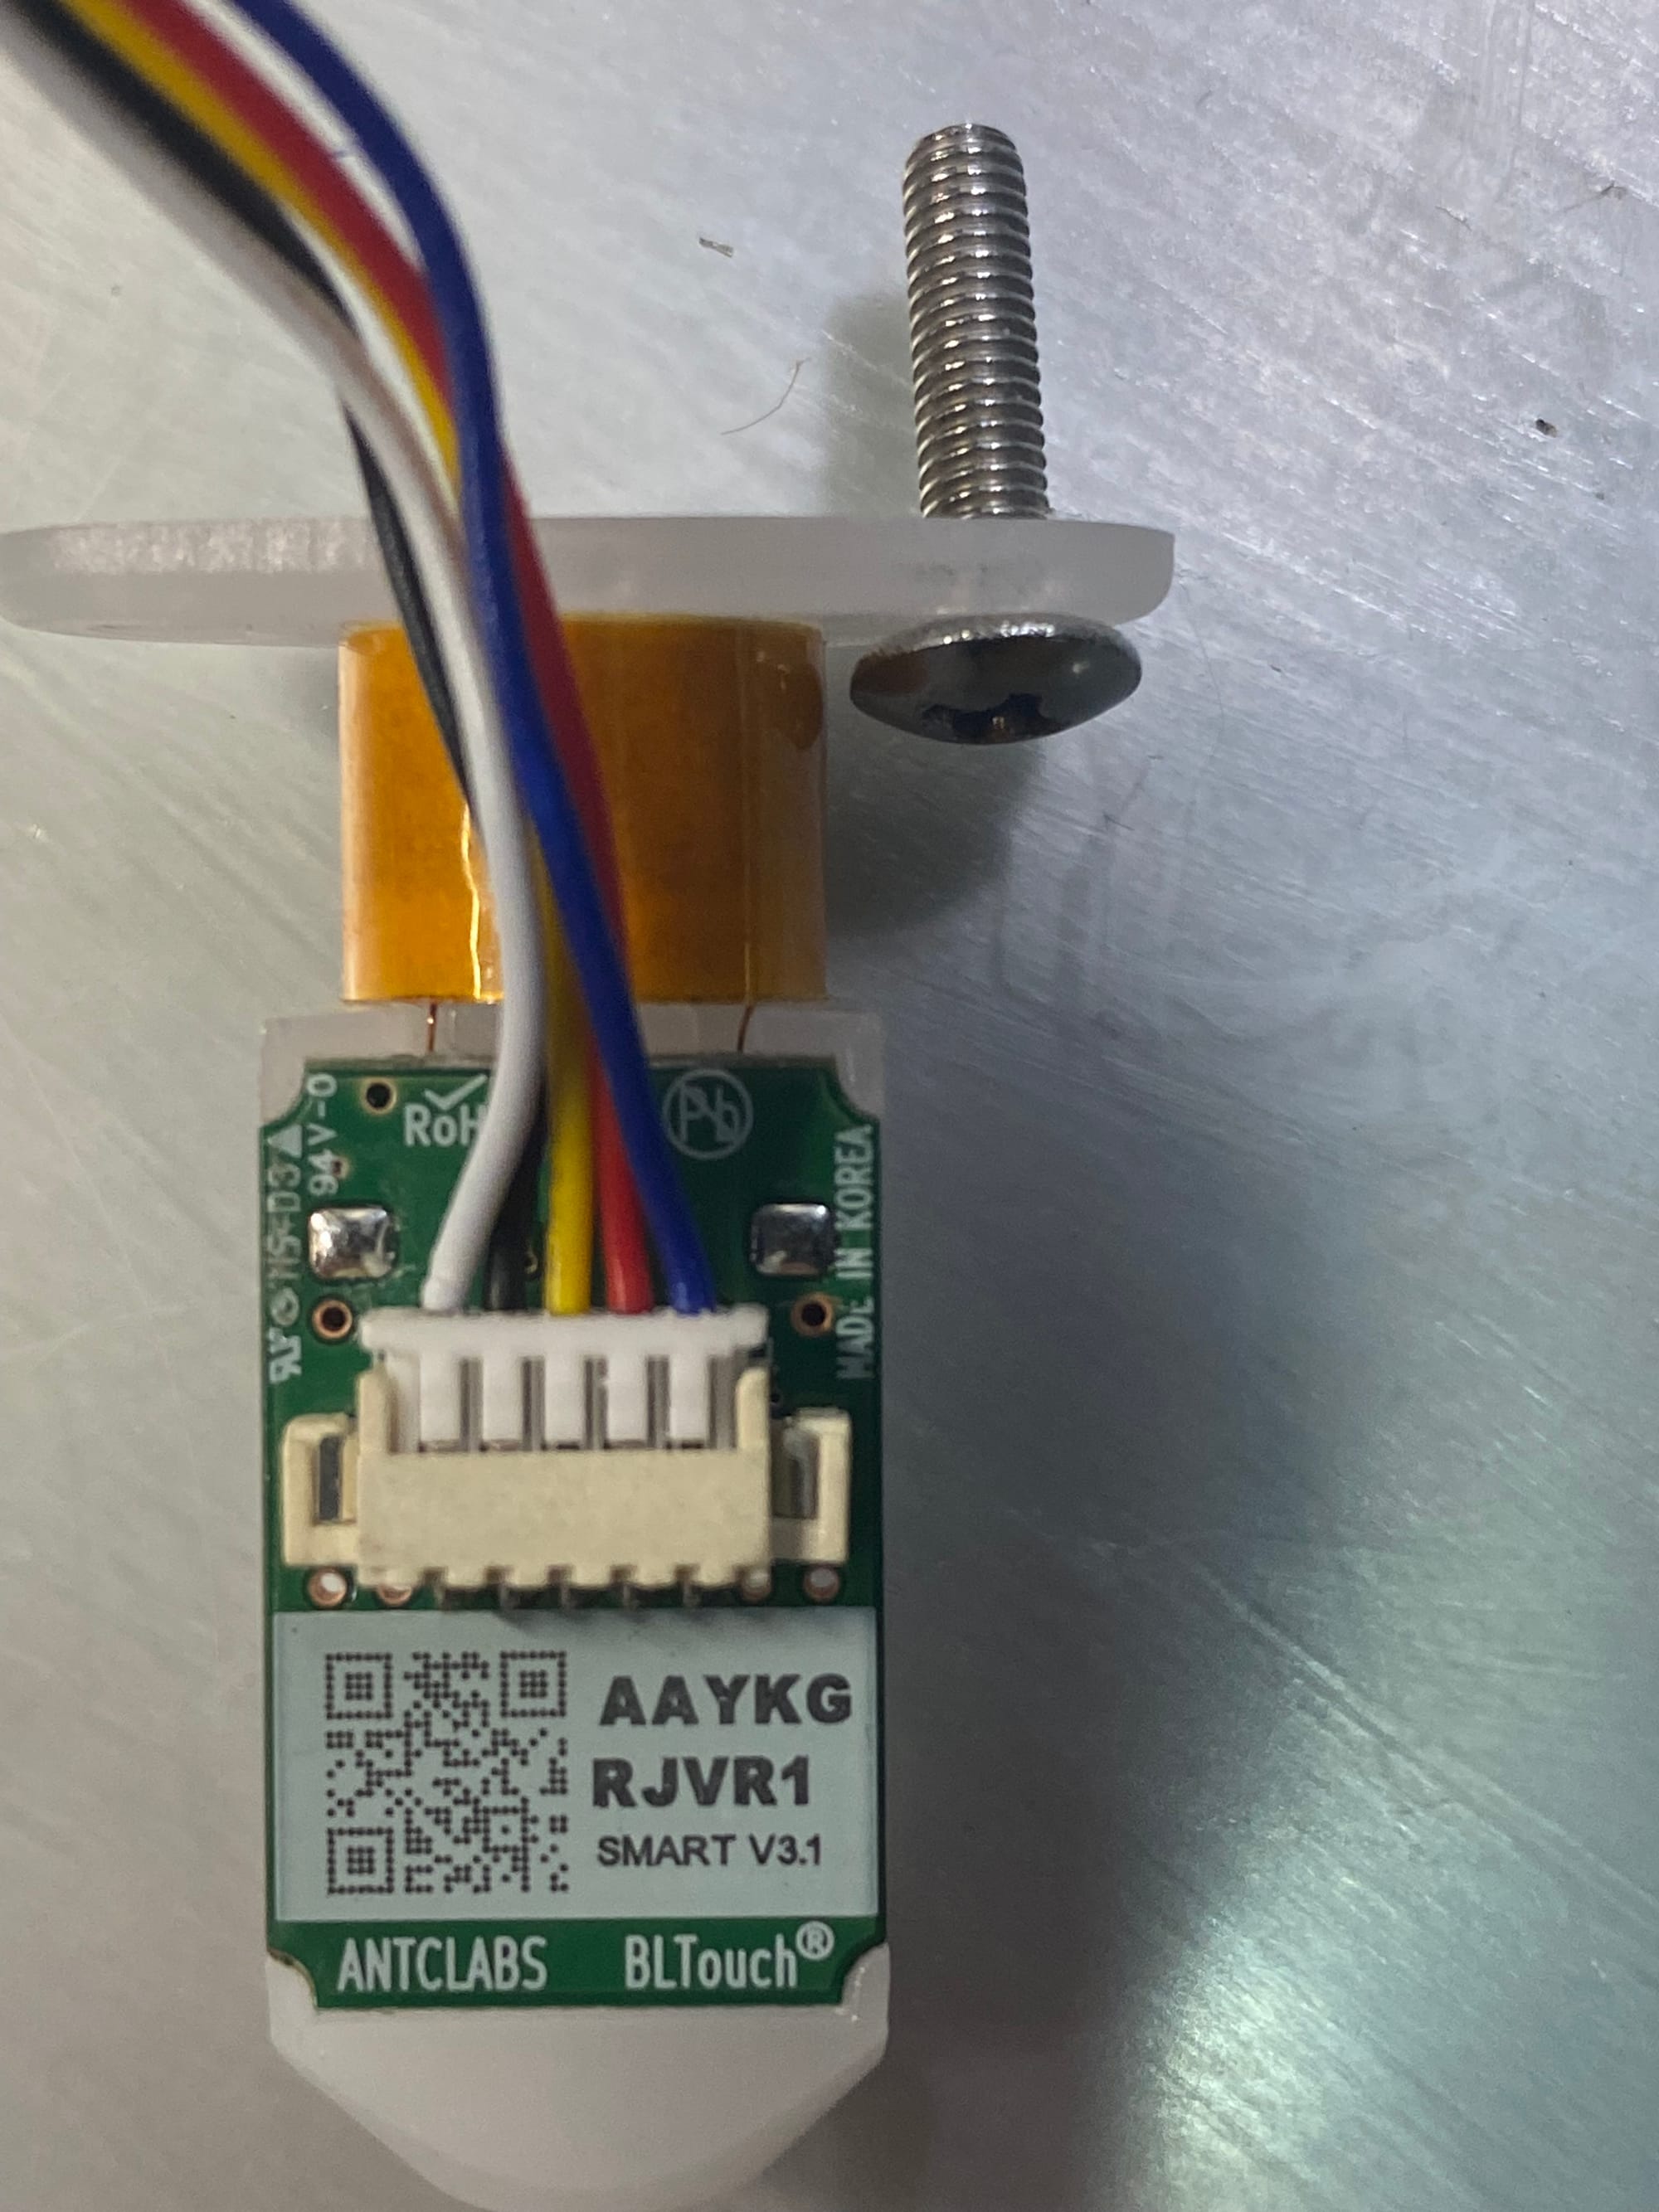
Turns out that the below definitions where the correct ones. I have seen that that some BLTouch`s use Brown instead of Blue.
| Wire Color | BLTouch Function |
|---|---|
| White | GND |
| Black | 5V |
| Yellow | SERVO Signal |
| Red | ZStop GND |
| Blue | ZStop Signal |
Now connecting it to the board.
Lets not judge the wiring technique shall we. 😄 I didn't have the extension kit that splits the connector from the BLTouch into a 3 and 2 pin female connectors. Dupont male to female will do the trick also right? 😄
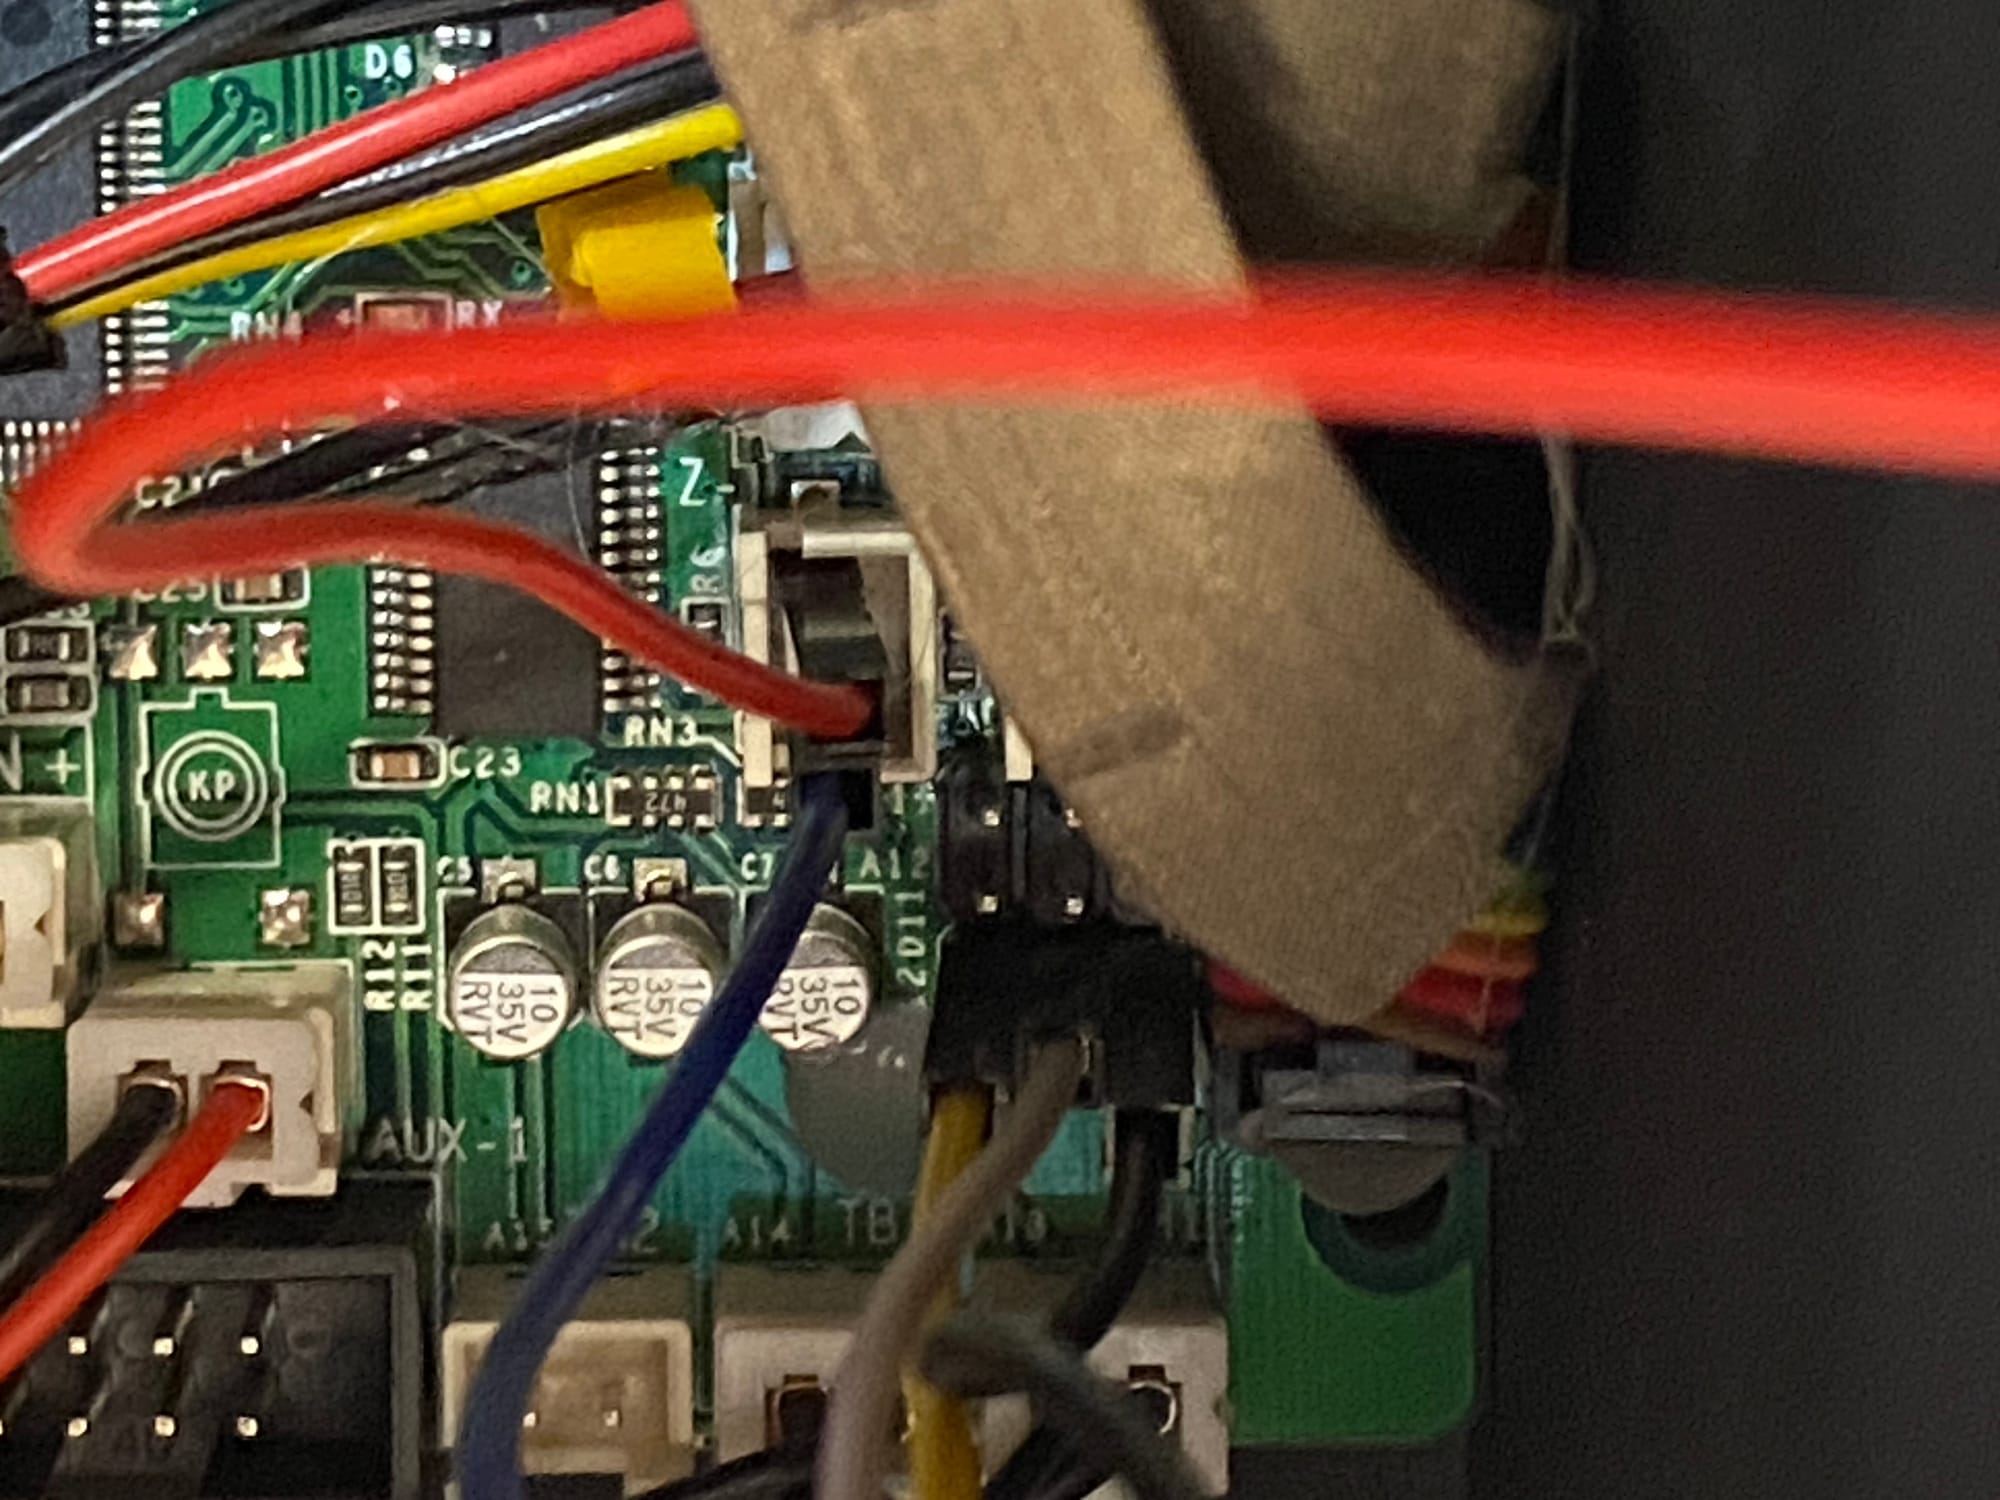
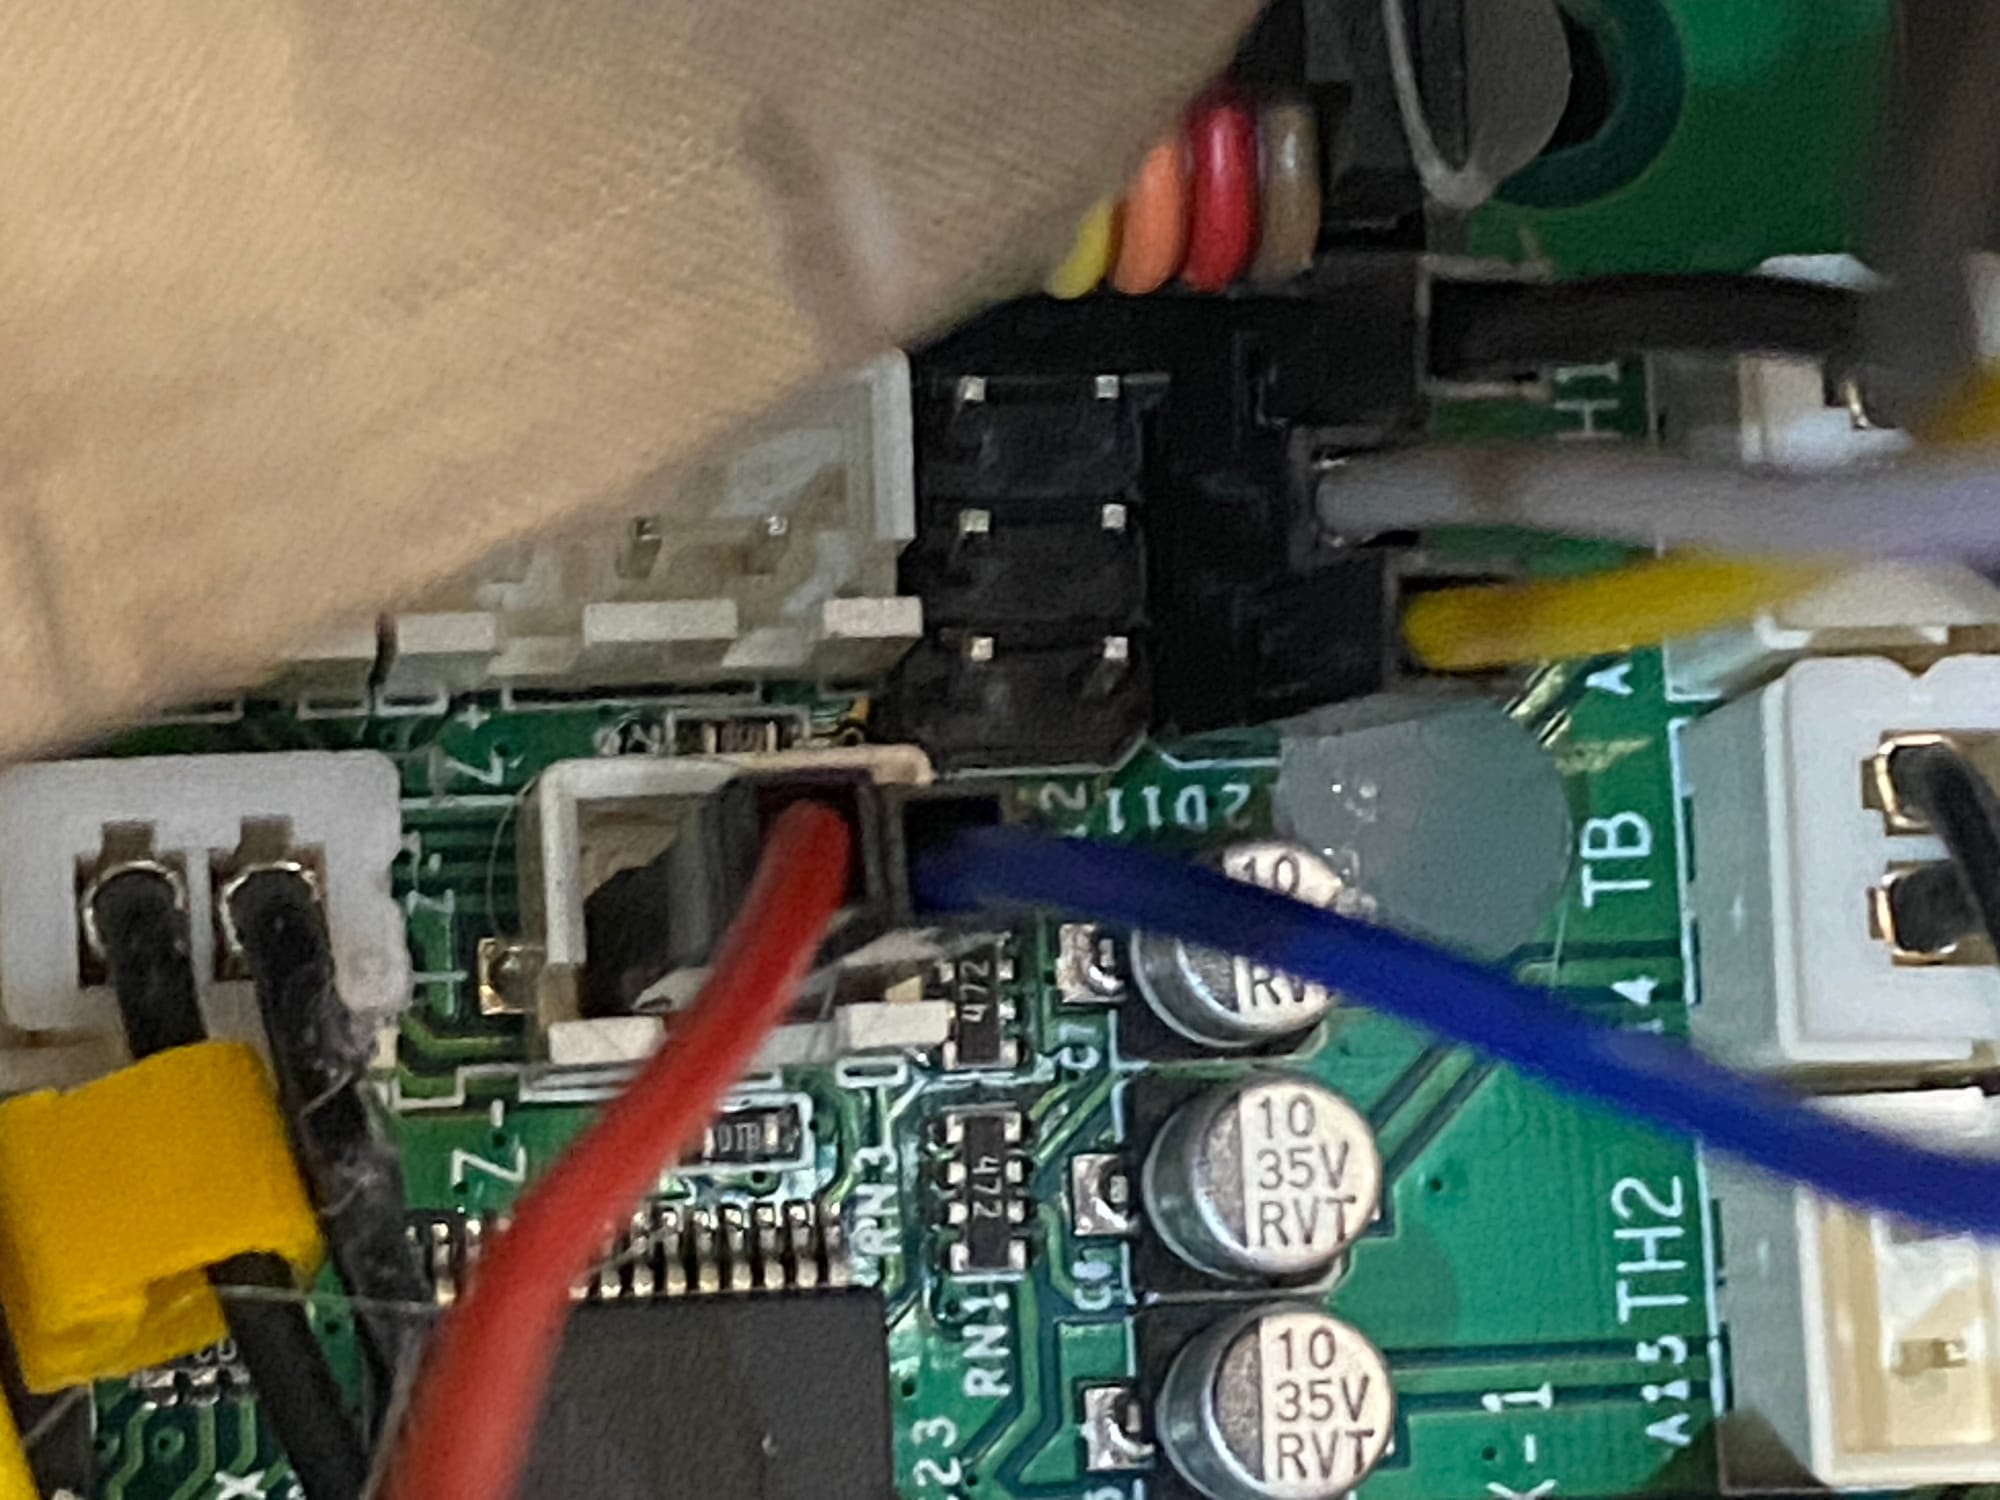
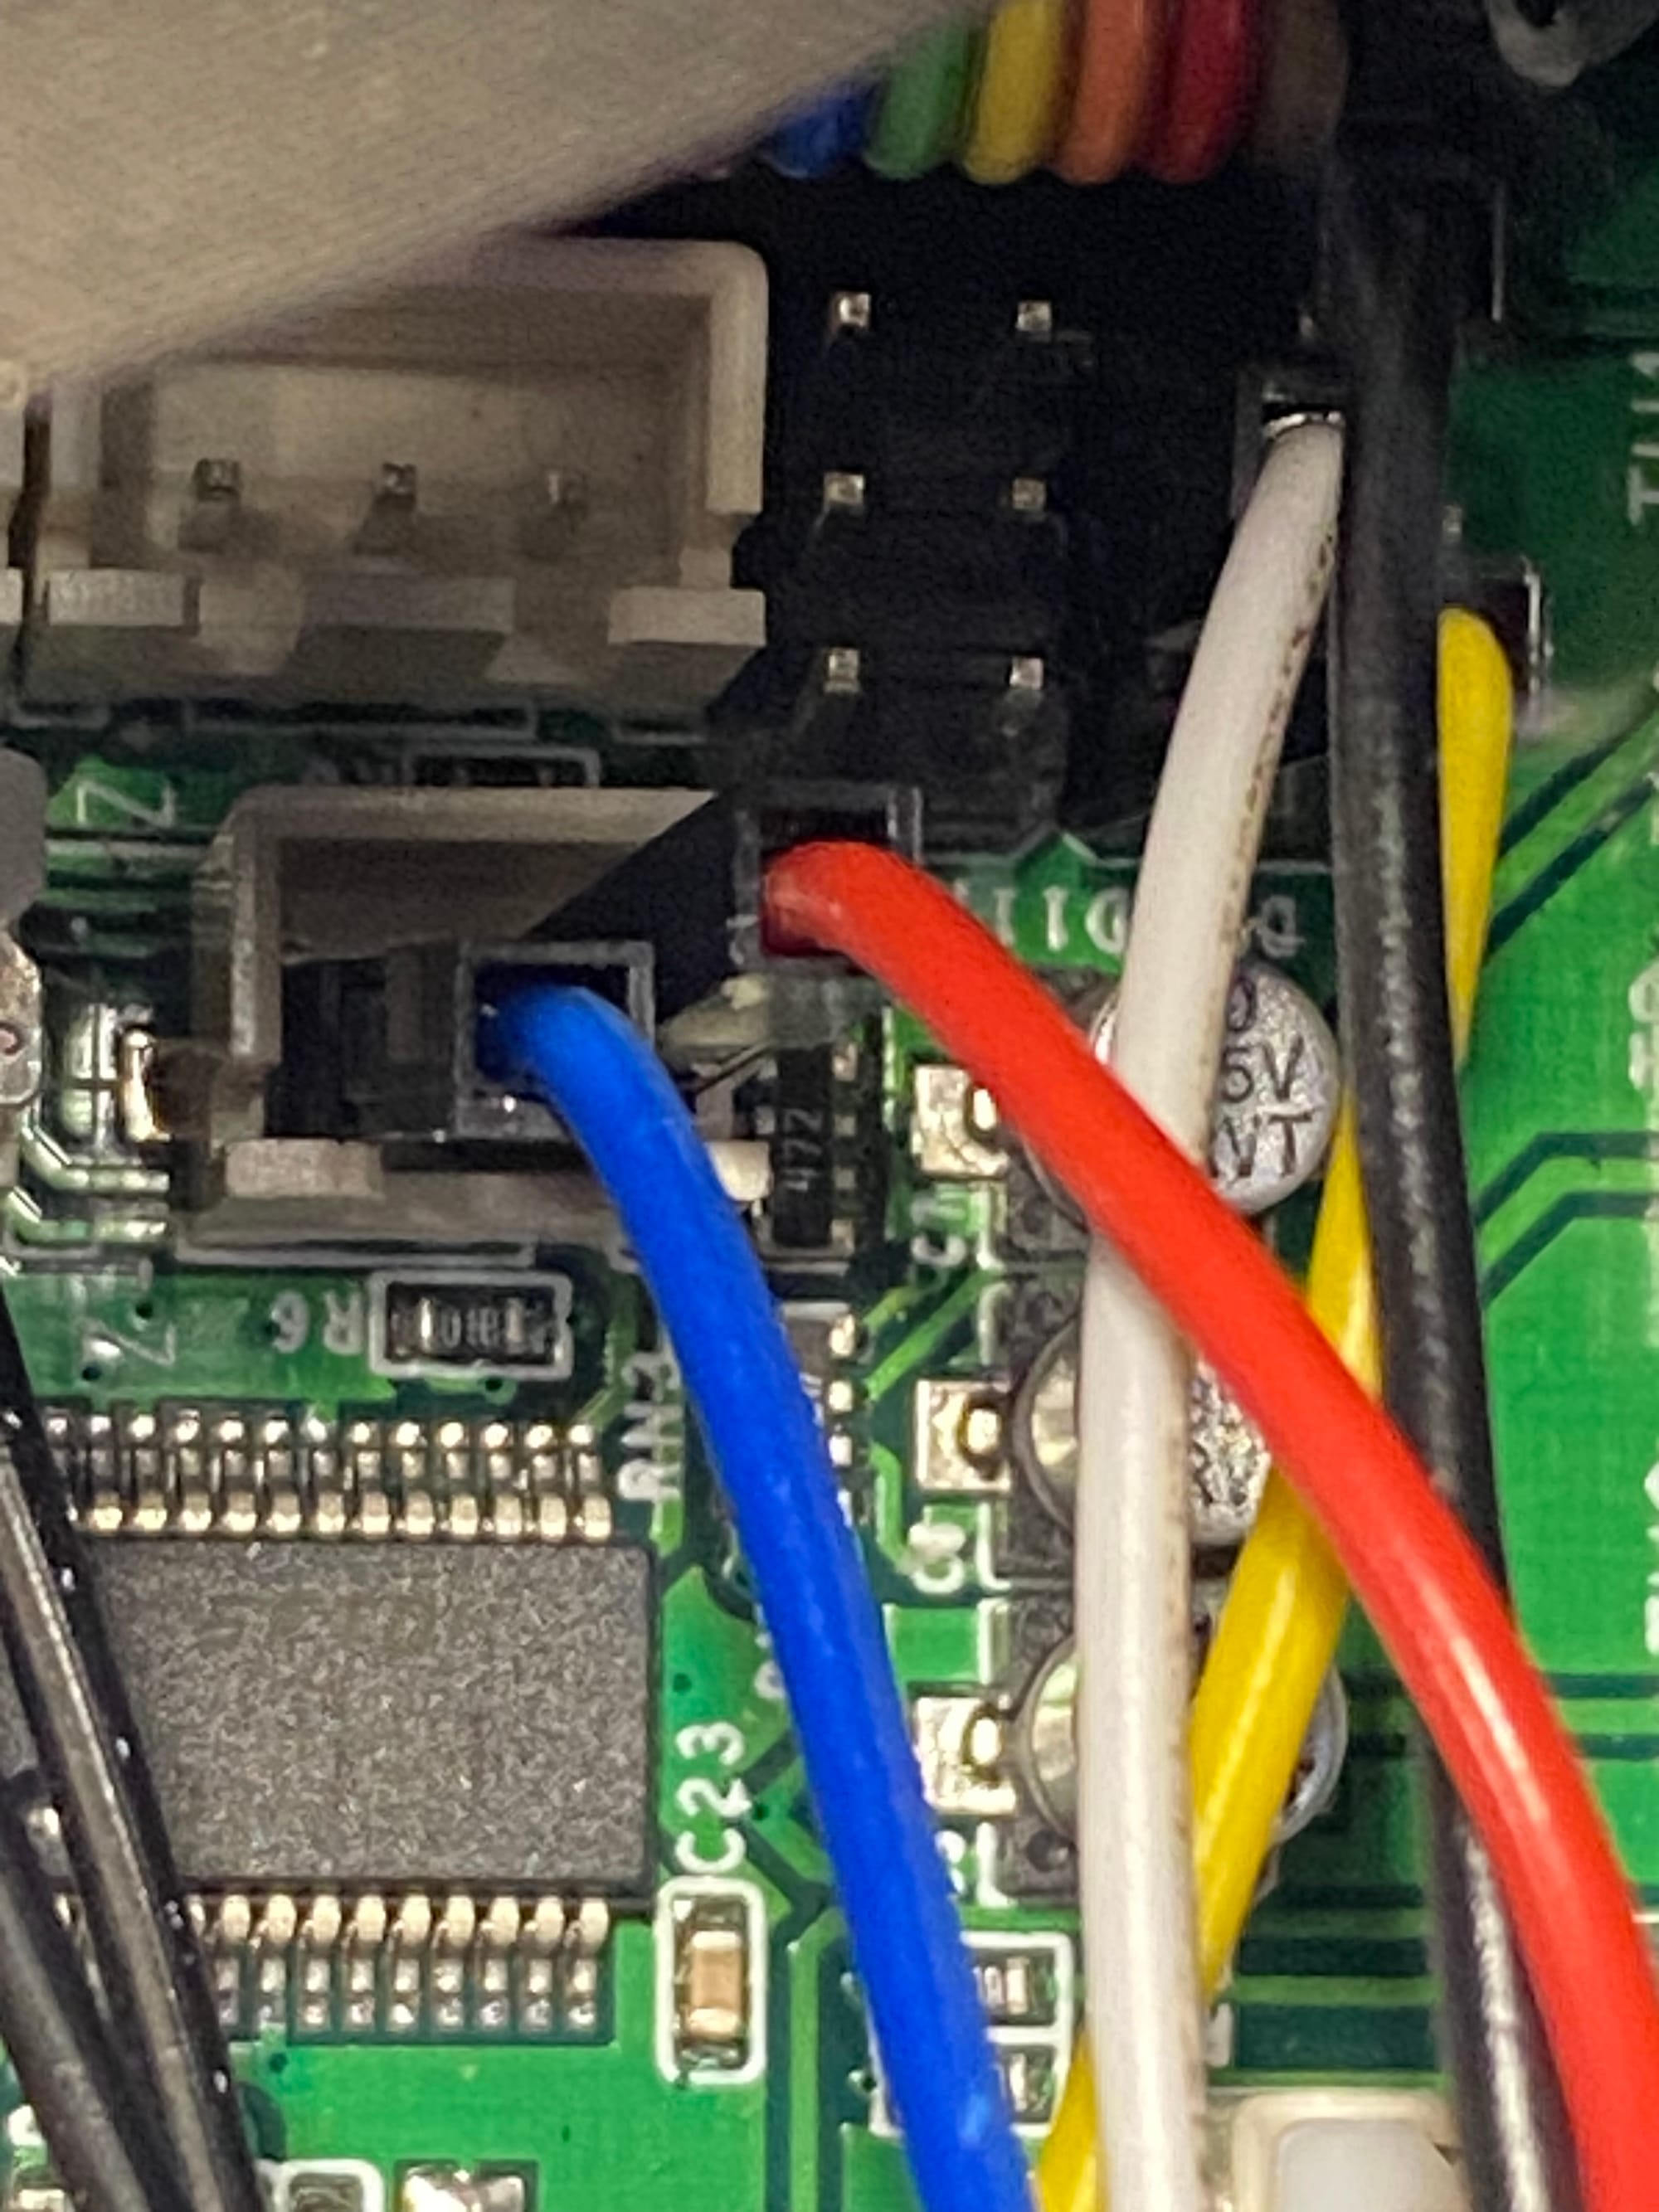
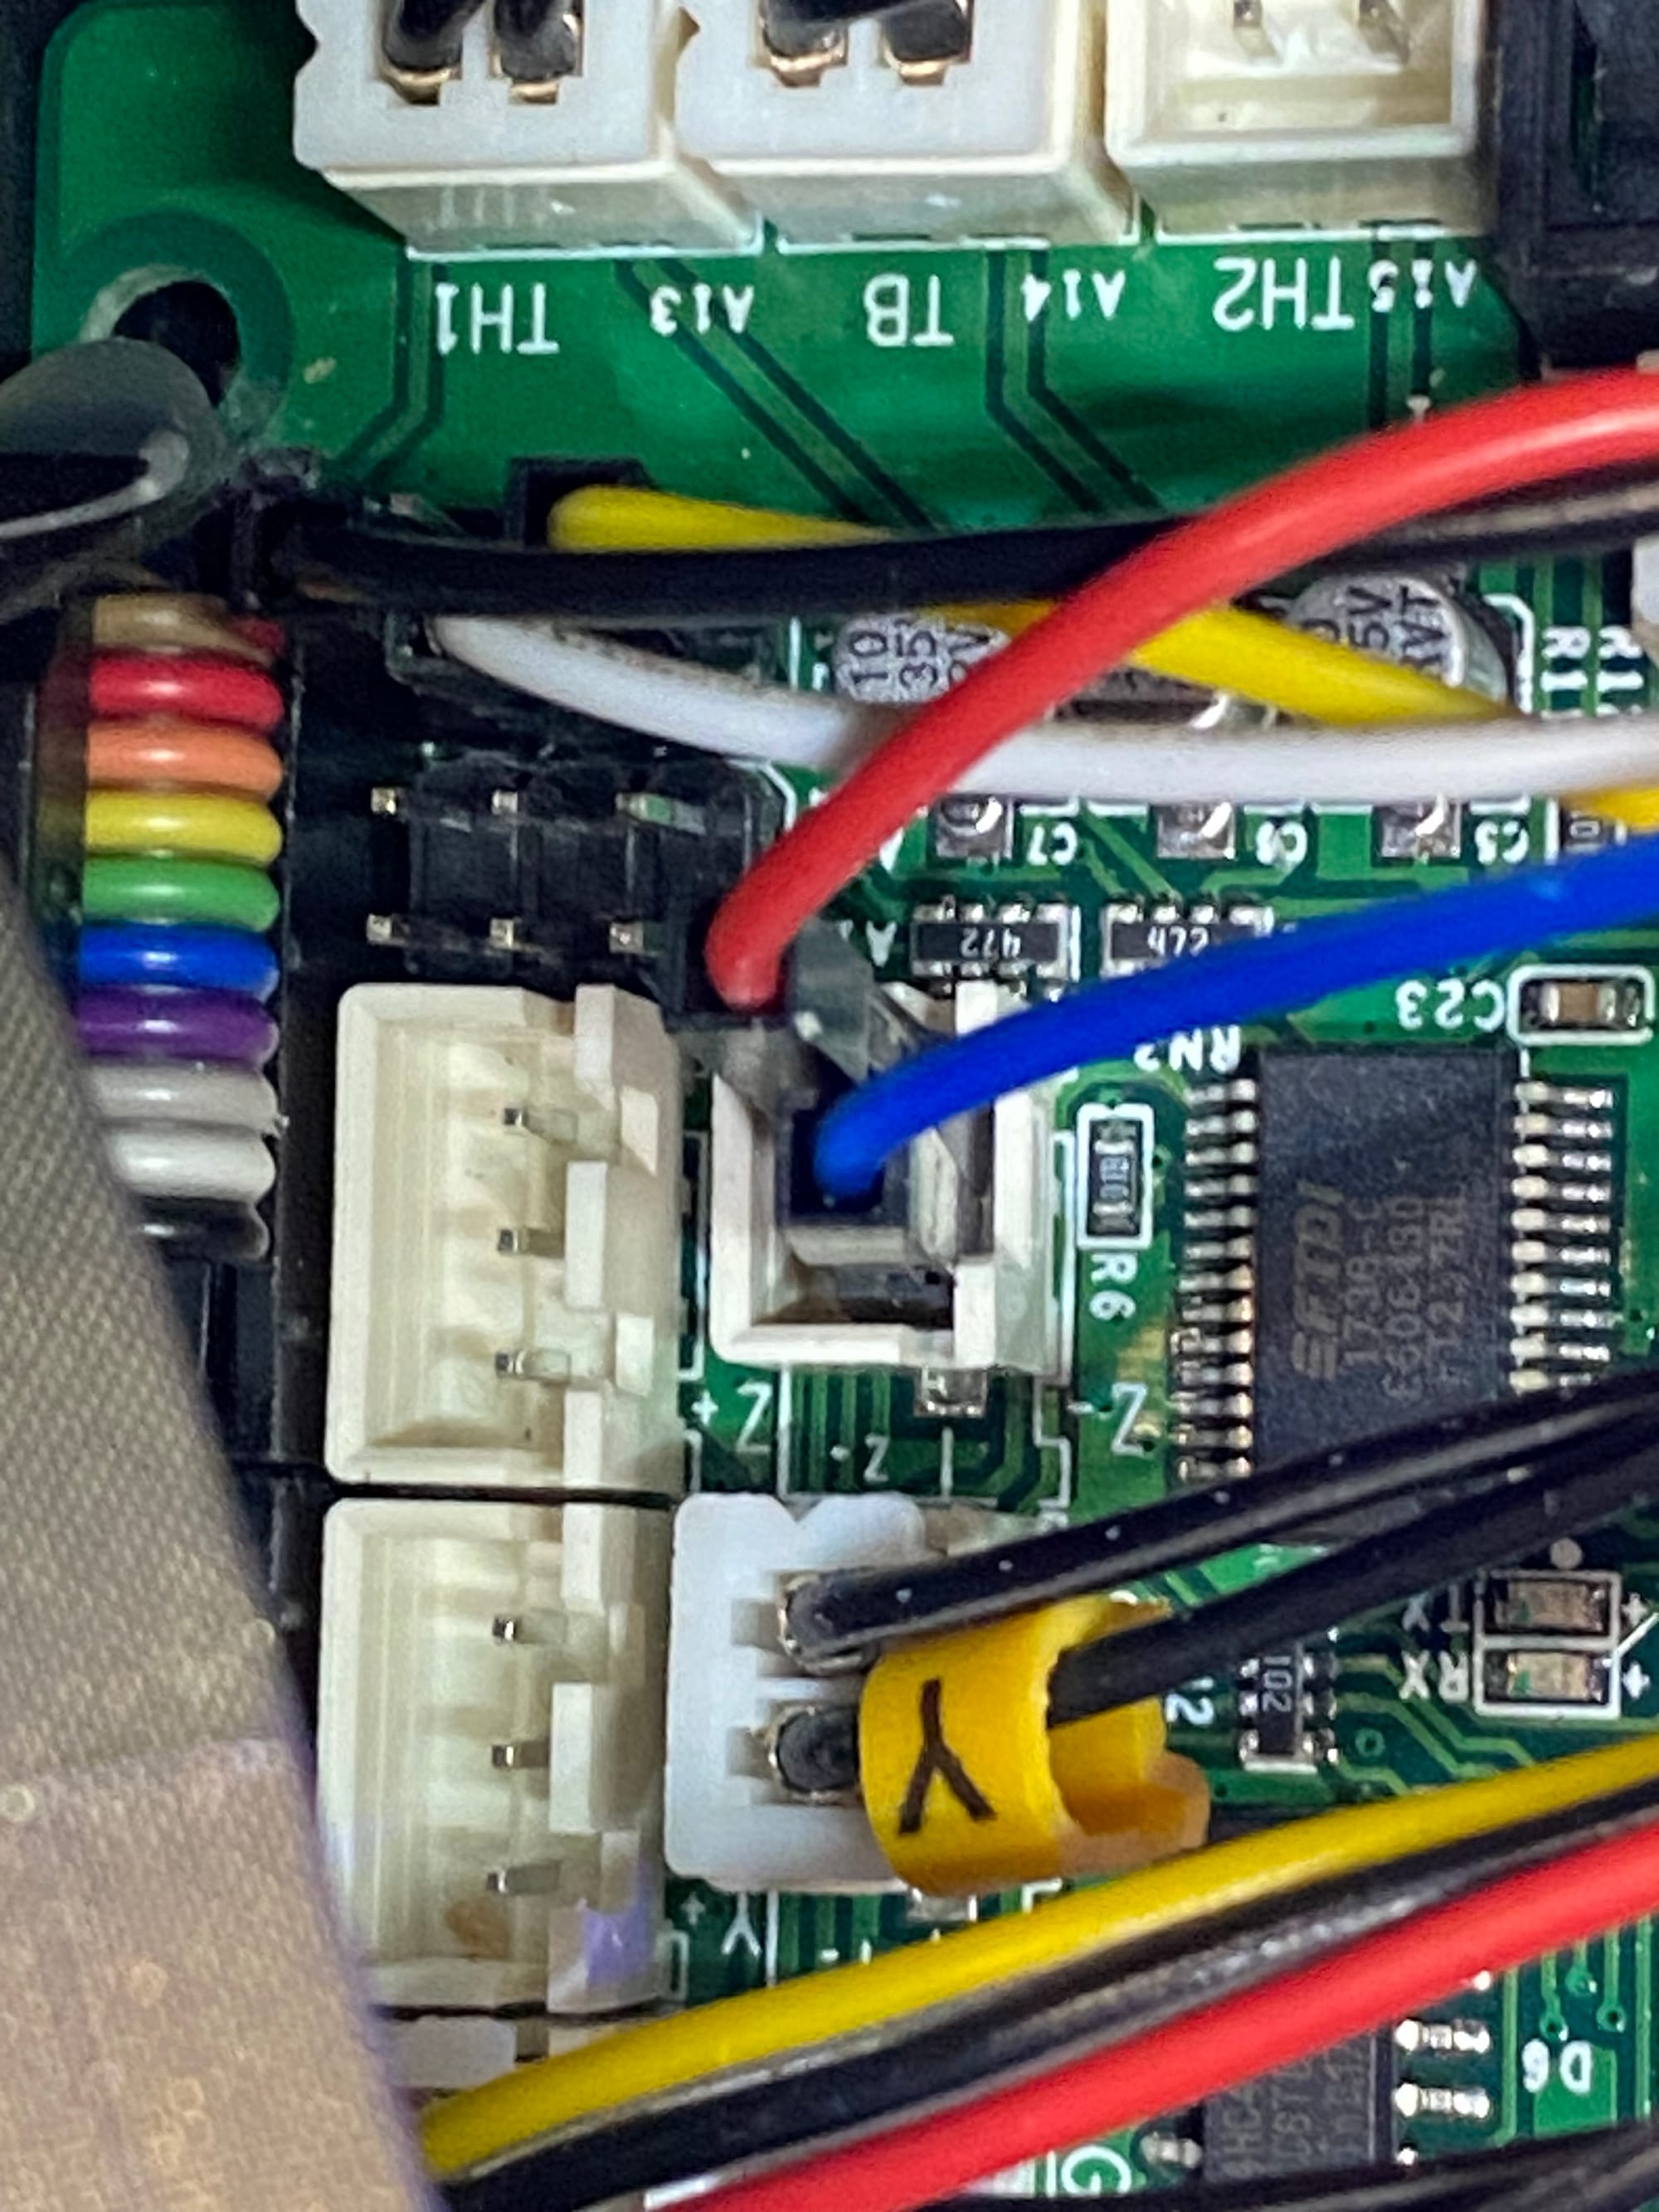
You have to remove the Z-End stop plug so you can replace it with the BLTouch`s Z-Stop GND and Signal wires.
| Wire Color | BLTouch Function | Board Pin |
|---|---|---|
| White | GND | A11 |
| Black | 5V | A12 |
| Yellow | SERVO Signal | D11 |
| Red | ZStop GND | D20 GND |
| Blue | ZStop Signal | D20 Signal |
Magic smoke test
Up until this point, I have tried a few combinations from tutorials that didn't work, so I am expecting the same with this.. To my surprise, the BLTouch turned and running an M119 gcode , I could see it was triggered!! Instead of me getting triggered this time😄
I didn't want to push my luck, so I didn't fully reassemble everything, I needed to get the firmware to flash the board so it could use the probe.
No stock firmware for you!
Ofcourse it wasn't going to be easy... Creality had a link to the CR10s BLTouch firmware but at the time, the link was down, I tried a few times the following day and still no luck. Looked for mirrors, still no good.
So I downloaded the latest Marlin at that time, which was 2.1.2.5. I also downloaded the example CR10s configuration.h and configuration_adv.h and opened it up in the Arduino IDE.
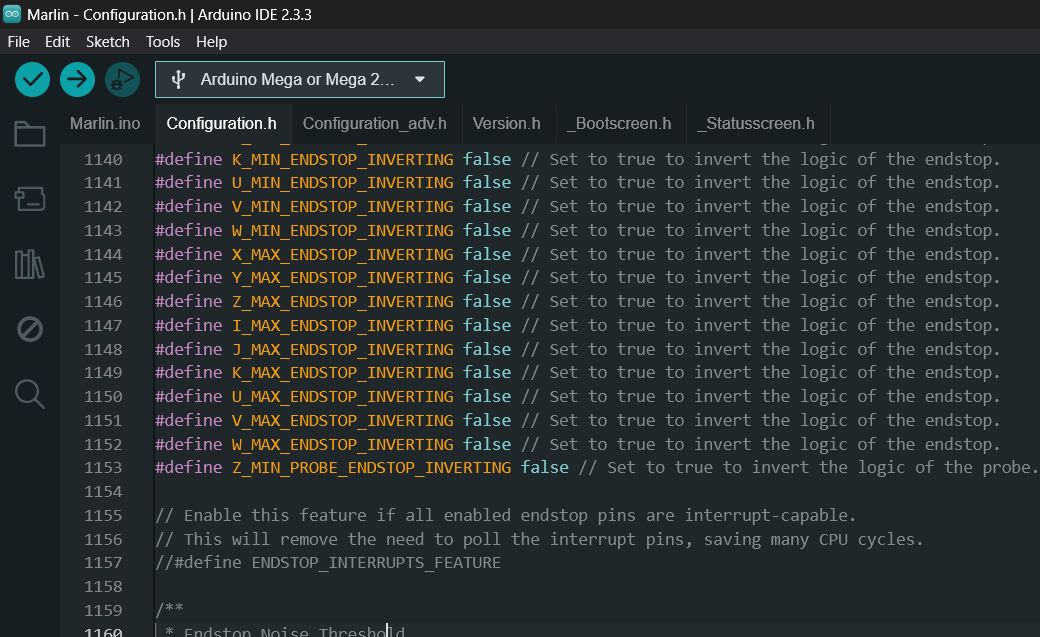
The first time I compiled, I used Cura to update the board with the new firmware. Odd thing that happened was that when I reconnected the USB cable to my PC, it would reboot the board. What I found was that Windows set the board rate of the COM port to 9600, I set it to what it should be, i.e. 115200 and the miraculously the rebooting stopped.
I went back into the configuration and enabled pretty much everything that was accessible via the LCD screen. Retraction, Z-Probe Wizard etc...
The test
With the feature rich firmware installed, I ran Auto-Home and had my finger on the power switch ready to turn it off it looked like it was ignoring the probe. Which thankfully it didn't need, the gantry stops moving as soon as the probe triggered!
I proceeded to then set the probe offsets, bed level and calibrate my Z offset. Next was the real test, actually printing something! Calibration cube is always a sure bet.
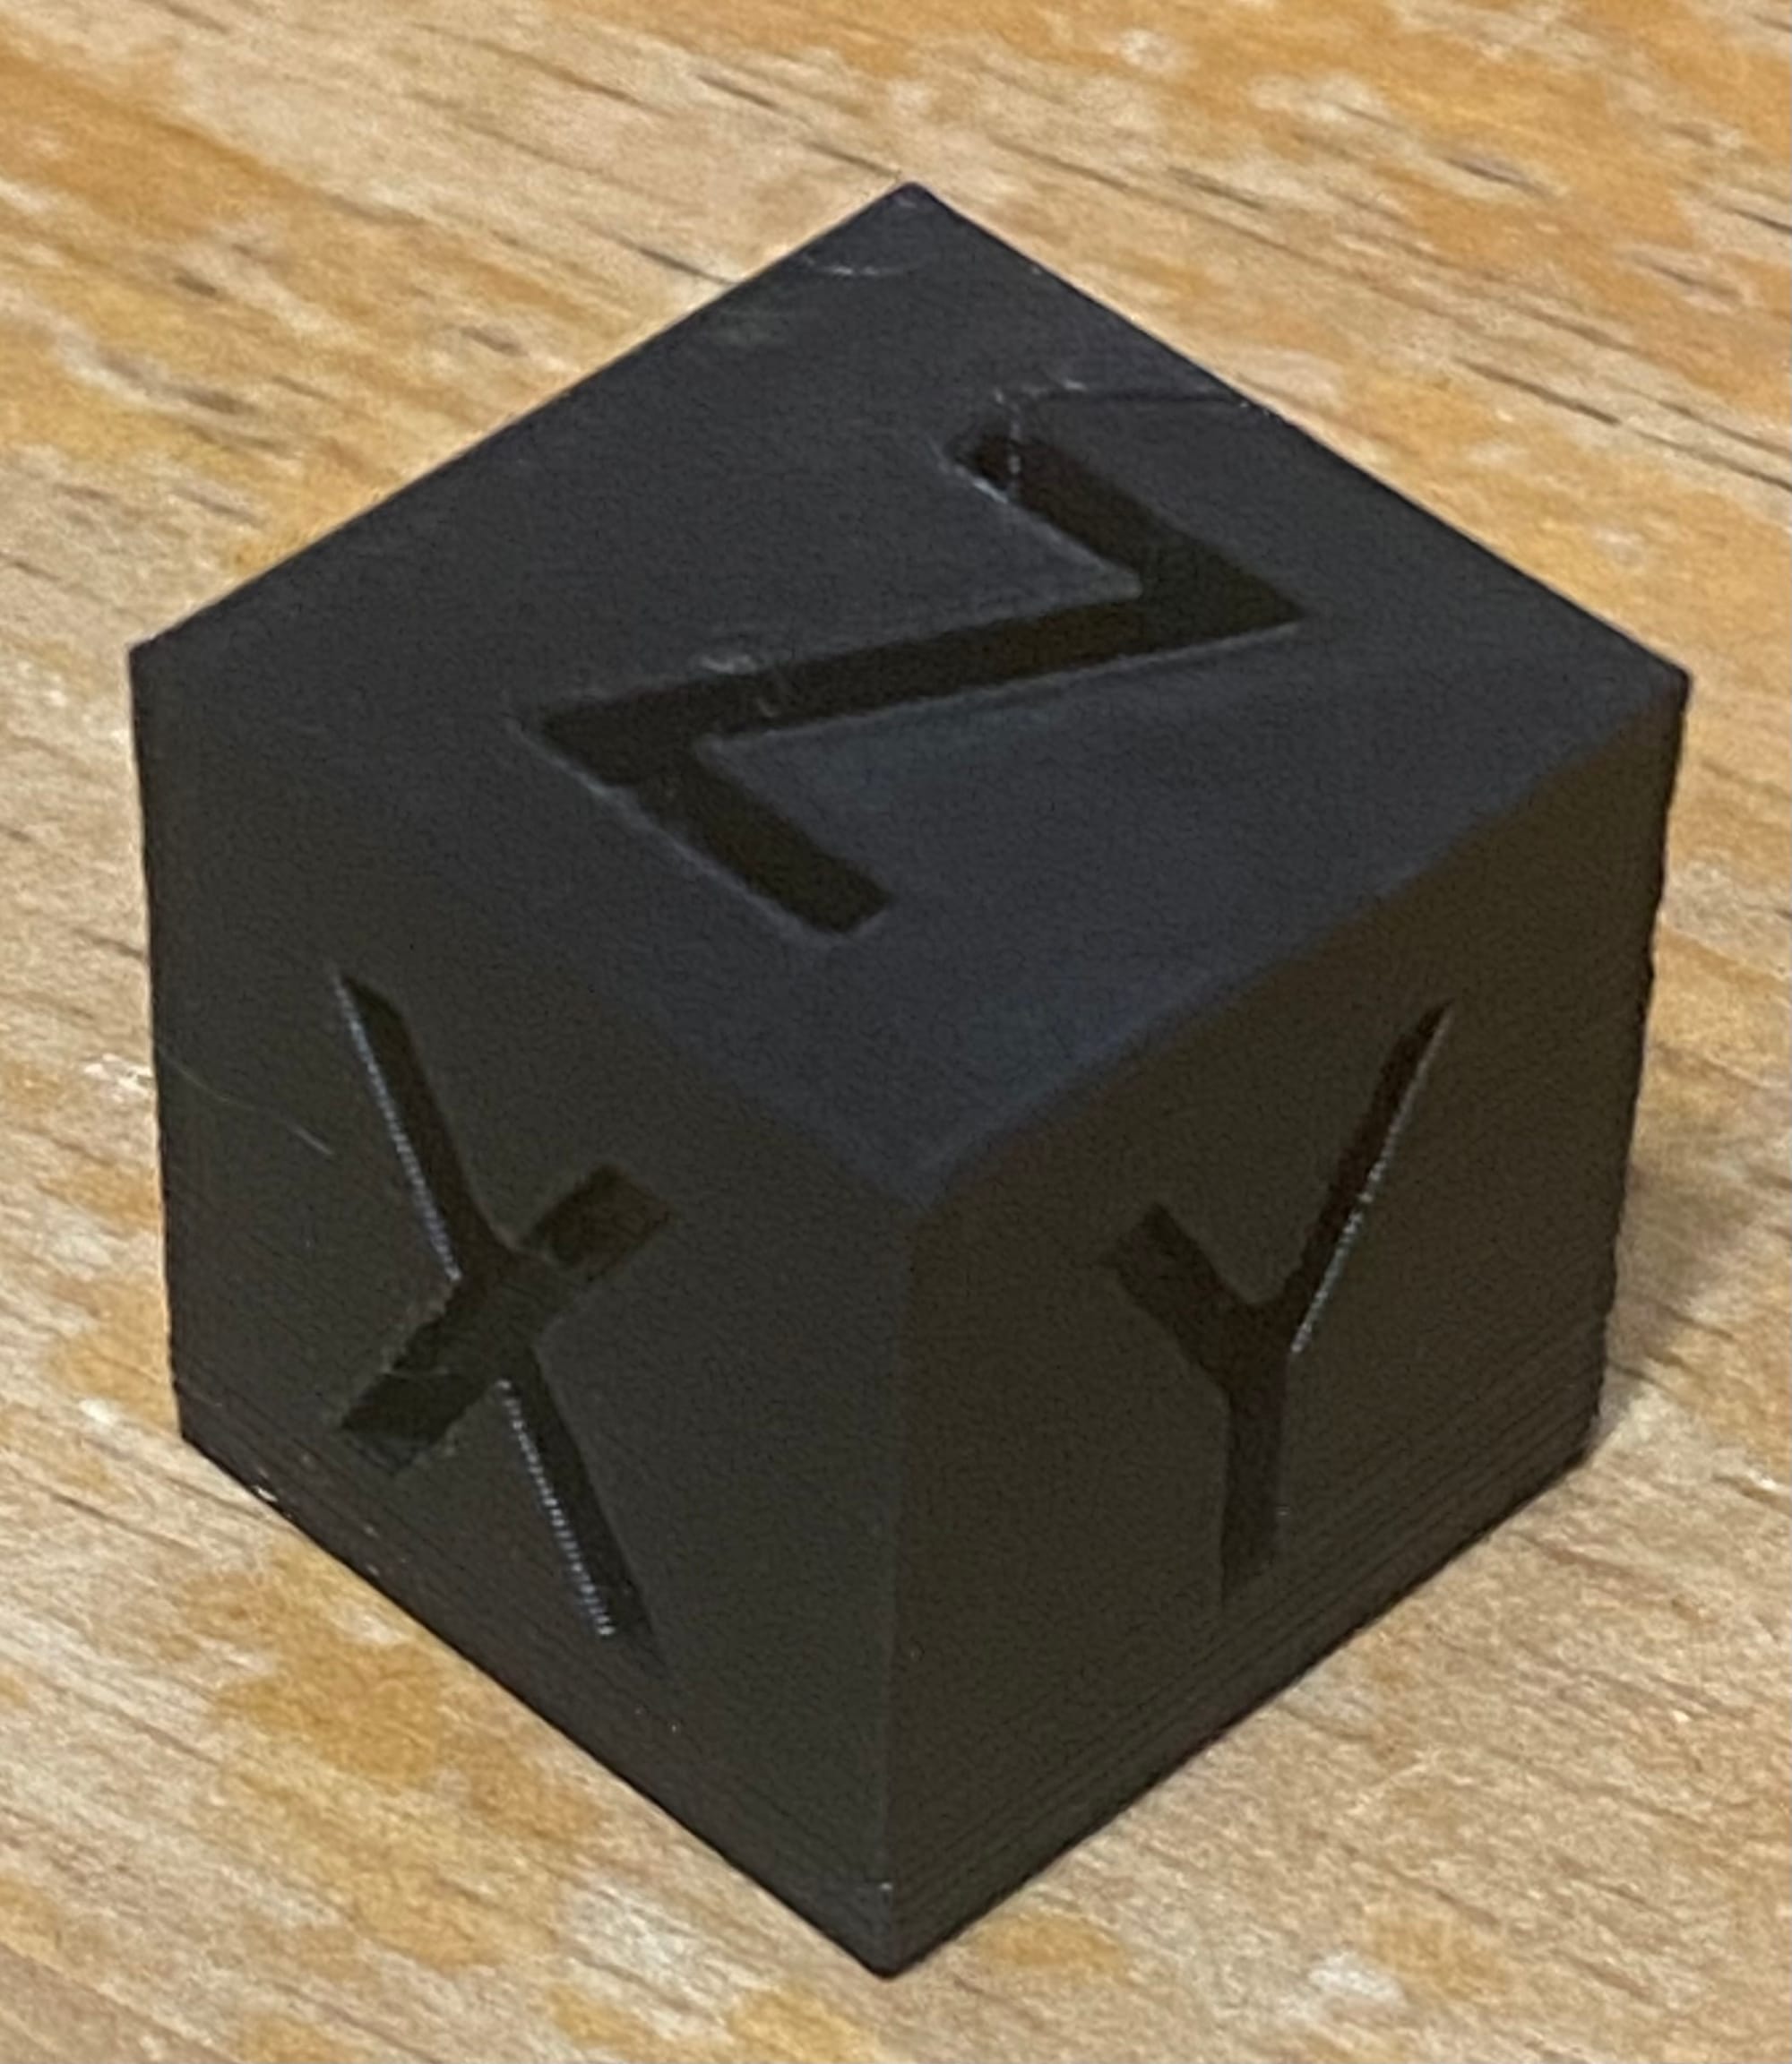
And viola!! Not a bad first print!
At this point, I got my handy glue gun out and made sure those DuPont wires wont budge and proceeded to put the rest of the controller box (Right term?) back together.
Lessons learned and saving anyone else the trouble.
In my ignorance, I thought that the CR10s would have the same connector on its board as the Ender. Wrong!.. But I now have firmware that has roughly the same functionality as the Ender, which is printing pretty nicely.
Below is the compiled firmware that I used for my CR10s, with the Creality 2.1 board and BLTouch V3.1. Hopefully it will help someone who is thinking about what I did.